Creating personalized pet beds
Welcome to my DIY guide on creating personalized pet beds for your furry friends. If you’re looking to provide them with the utmost comfort and a unique sleeping space, this article is for you. Follow these easy-to-follow steps to create a one-of-a-kind pet bed that reflects your pet’s personality and your crafting skills. Creating personalized pet beds
Key Takeaways:
- Learn how to create personalized pet beds with this DIY guide. Creating personalized pet beds
- Discover the materials and fabrics needed for your pet bed project. Creating personalized pet beds
- Master the art of measuring, cutting, and sewing fabrics for a perfect fit.
- Add extra comfort to your pet bed with proper padding and filling techniques.
- Personalize your pet bed with embellishments and creative design ideas. Creating personalized pet beds
- Ensure proper cleaning and maintenance for a hygienic and long-lasting pet bed.
- Take note of safety considerations to provide a secure sleeping environment for your pet. Creating personalized pet beds
Materials Needed for Creating Personalized Pet Beds
Before you embark on creating a personalized pet bed, it’s important to gather all the necessary materials. This section will outline the items you’ll need for this exciting DIY project. Remember, the right materials will ensure that your pet bed is not only comfortable but also durable and long-lasting. Creating personalized pet beds
- Fabric: Choose a soft and durable fabric that suits your pet’s preferences. Consider factors such as temperature, ease of cleaning, and resistance to wear and tear. Creating personalized pet beds
- Foam or Cushion: Select a high-quality foam or cushion that provides adequate support and comfort for your furry friend. The thickness and density of the foam should be appropriate for your pet’s size and sleeping habits. Creating personalized pet beds
- Thread: Use a strong and durable thread that matches or complements the color of your fabric. This will ensure that your pet bed withstands regular use and remains visually appealing.
- Needles: Have a variety of sewing needles on hand, including straight and curved needles. These will assist in sewing different parts of the pet bed and working with different fabric thicknesses. Creating personalized pet beds
- Scissors: Invest in a pair of sharp fabric scissors for precise cutting. Having a pair of small embroidery scissors or thread snips will also be handy for trimming excess thread.
- Measuring Tape: Accurate measurements are essential for creating a well-fitting pet bed. Make sure you have a measuring tape to measure the dimensions of your pet and the fabric pieces. Creating personalized pet beds
- Marking Tool: Use a fabric marking tool, such as tailors’ chalk or disappearing ink pens, to mark important lines and measurements on the fabric. This will help guide your cutting and sewing process.
- Embellishments: If you plan to personalize your pet bed with decorative embellishments, gather materials such as ribbons, buttons, appliques, or embroidery thread. These will add a special touch to your creation. Creating personalized pet beds
By ensuring you have all the materials mentioned above, you’ll be well-prepared to create a personalized pet bed that is not only functional but also reflects your furry friend’s unique personality. Creating personalized pet beds
Choosing the Right Fabrics for Your Pet Bed
When creating a personalized pet bed, one of the most vital decisions you’ll make is choosing the right fabrics. The fabric you select will not only affect the comfort of your pet but also determine the durability and longevity of the bed. By considering your pet’s needs and preferences, you can make an informed choice that will provide the ultimate sleep experience.
Factors to Consider
When choosing fabrics for your pet bed, there are several factors to consider:
- Softness: Opt for soft and cozy fabrics that will provide your pet with a comfortable sleeping surface.
- Durability: Pets can be quite rough on their beds, so it’s essential to choose fabrics that can withstand their playful antics and regular use.
- Ease of Cleaning: Select fabrics that are easy to clean, as pet beds can quickly accumulate dirt, fur, and odor. Machine-washable fabrics with stain-resistant properties are ideal for hassle-free maintenance.
- Hypoallergenic Properties: If your pet has allergies or sensitivities, consider fabrics that are hypoallergenic and gentle on their skin.
Now let’s explore some popular fabric choices for pet beds:
| Fabric Type | Description |
|---|---|
| Fleece | A soft and warm fabric that is perfect for colder climates. Fleece is also highly durable and easy to clean. |
| Canvas | Canvas is a sturdy and durable fabric that resists scratches and tears. It’s an excellent choice for pets who love to dig or scratch their beds. |
| Cotton | Known for its breathability, cotton is a comfortable fabric choice. It’s hypoallergenic and easy to care for. |
| Microfiber | Microfiber is a synthetic fabric that is incredibly soft and resistant to stains. It’s a popular choice for pet beds because of its durability and easy maintenance. |
Remember, the fabric you choose should be pet-safe, non-toxic, and free from small fibers that could pose a choking hazard. Take into account your pet’s size, behavior, and any specific needs they may have. Creating personalized pet beds
Choosing the right fabrics for your pet bed is crucial for providing a comfortable and safe resting place for your furry friend. By considering factors like softness, durability, ease of cleaning, and hypoallergenic properties, you can select the perfect fabric that meets both your pet’s needs and your design preferences. Creating personalized pet beds
Measuring and Cutting the Fabrics
Accurate measurements and precise cutting are crucial steps in creating a well-fitting personalized pet bed. Follow this step-by-step guide to ensure your fabrics are cut to perfection.
Step 1: Gathering Your Materials
Before you begin measuring and cutting the fabrics, make sure you have the following materials on hand:
- Fabric of your choice
- Scissors or rotary cutter
- Measuring tape or ruler
- Straight pins or clips
Step 2: Measuring the Base
Start by measuring the base of your pet bed. Use a measuring tape or ruler to measure the length and width. Take note of these measurements as they will determine the size of your fabric pieces.
Step 3: Cutting the Base Fabric
Using your measurements from Step 2, cut the base fabric for your pet bed. Ensure that the fabric is cut in a square or rectangular shape, matching the length and width of the base.
Step 4: Measuring the Side Panels
Measure the height of the base to determine the size of the side panels. This measurement will determine the length of the side fabric pieces. Creating personalized pet beds
Step 5: Cutting the Side Fabric
Using your measurement from Step 4, cut the side fabric. The side fabric should be long enough to wrap around the base and create a snug fit. Creating personalized pet beds
Step 6: Adding Seam Allowance
Remember to add a seam allowance of about 1/2 inch to all your fabric pieces. This extra allowance will ensure that your pet bed is easy to sew and allows for slight variations in measurements. Creating personalized pet beds
Step 7: Pinning and Sewing
Secure the fabric pieces together using straight pins or clips. Sew along the edges, leaving a small opening for stuffing.
“Accurate measurements and precise cutting are essential for creating a well-fitting personalized pet bed.”
Once you have completed these steps, you will have the necessary fabric pieces ready for assembling your personalized pet bed. Stay tuned for the next section, where we will explore sewing techniques to bring your pet bed to life.
| Step | Description |
|---|---|
| Step 1 | Gathering Your Materials |
| Step 2 | Measuring the Base |
| Step 3 | Cutting the Base Fabric |
| Step 4 | Measuring the Side Panels |
| Step 5 | Cutting the Side Fabric |
| Step 6 | Adding Seam Allowance |
| Step 7 | Pinning and Sewing |
Sewing Techniques for Assembling the Pet Bed
Sewing the different fabric pieces together is a crucial step in creating a personalized pet bed. By using the right techniques, you can ensure a sturdy and attractive final result that will provide your furry friend with a comfortable sleeping space. Let’s explore the various sewing techniques used in assembling personalized pet beds. Creating personalized pet beds
The Basics of Sewing
Before we dive into the specific techniques, let’s go over a few basic sewing terms and skills that will come in handy during the assembly process:
- Backstitching: This technique involves sewing a few stitches in reverse at the beginning and end of a seam to secure the threads.
- Seam allowances: These are the extra spaces between the edge of the fabric and the stitch line. They allow for adjustments and provide neat finishes.
- Pinning: Pinning the fabric pieces together before sewing helps keep them aligned and prevents shifting. Creating personalized pet beds
Technique 1: Straight Stitch
The straight stitch is the most basic and commonly used sewing technique. It involves sewing two fabric pieces together in a straight line. Use a presser foot that aligns with the edge of the fabric and set your machine to a straight stitch. Sew along the seam line, keeping the edges aligned and the stitches even. Creating personalized pet beds
Technique 2: Zigzag Stitch
The zigzag stitch is particularly useful for preventing fraying and adding durability to the seams. It creates a zigzag pattern as it sews, securing the fabric edges. Set your machine to a zigzag stitch and adjust the width and length according to your project’s needs. Sew along the edges of the fabric pieces, making sure the stitches catch both layers.
Technique 3: Topstitching
Topstitching adds a decorative element while reinforcing the seams. It involves sewing a row of stitches on the top of the fabric, usually close to the edge or along a specific design element. Use a straight stitch or a decorative stitch pattern to achieve the desired effect. Creating personalized pet beds
Technique 4: French Seam
The French seam creates a clean and neat finish, enclosing the raw edges within the seam. It is commonly used when working with lightweight or delicate fabrics. Follow these steps to create a French seam:
- With the wrong sides of the fabric facing each other, sew a narrow seam along the edge.
- Trim the seam allowance to about half its original width. Creating personalized pet beds
- Press the seam open.
- Now, fold the fabric along the seam, encasing the raw edges.
- Sew another seam, enclosing the previous raw edges and creating a neat finish.
Technique 5: Box Corners
Creating box corners adds depth and shape to your pet bed. It involves sewing diagonal lines at the corners to make them look square. Follow these steps to sew box corners:
- Flatten the corner so that the side seam and bottom seam align, creating a triangle shape.
- Measure and mark a line at a right angle from the corner point. The length of the line determines the depth of your box corner.
- Sew along the marked line, backstitching at the beginning and end.
- Carefully trim the excess fabric, leaving a small seam allowance. Creating personalized pet beds
By mastering these sewing techniques, you’ll be able to assemble a personalized pet bed that not only looks fantastic but also withstands the test of time. With practice, your sewing skills will improve, and you’ll have the confidence to create more intricate designs for your furry companions. Creating personalized pet beds
| Technique | Description |
|---|---|
| Straight Stitch | A basic sewing technique used to sew two fabric pieces together in a straight line. |
| Zigzag Stitch | A technique that creates a zigzag pattern to prevent fraying and add durability to the seams. |
| Topstitching | A decorative stitching technique that reinforces the seams and adds visual interest. |
| French Seam | A method of sewing that encloses the raw edges within the seam, creating a clean finish. |
| Box Corners | A technique for adding depth and shape to the corners of the pet bed. |
Adding Extra Comfort with Padding and Filling
When it comes to creating a personalized pet bed, comfort is key. Adding padding and filling can significantly enhance the coziness of your pet’s sleeping space. Let’s explore the different options available and learn how to properly stuff and secure the filling for optimal comfort. Creating personalized pet beds
Choosing the Right Padding
Before you start filling your pet bed, it’s essential to choose the right padding. There are various types of padding to consider, such as:
- Memory foam: Provides excellent support and conforms to your pet’s body shape.
- Polyester fiberfill: Lightweight and soft, offering a plush sleeping surface.
- Cedar chips: Natural and moisture-absorbing, while also repelling fleas and insects.
Consider your pet’s preferences and specific needs when selecting the ideal padding material for their bed. Creating personalized pet beds
Stuffing and Securing the Filling
Once you’ve chosen the right padding, it’s time to stuff it into the pet bed. Keep the following tips in mind:
- Start small: Begin by adding a moderate amount of filling, allowing your pet to test the comfort level. You can always add more if needed.
- Distribute evenly: Ensure the filling is evenly distributed to provide consistent support throughout the bed.
- Secure the filling: Use a fabric liner or zipper enclosure to keep the padding in place and prevent shifting.
By following these steps, you can create a pet bed that is both plush and secure, ensuring your furry friend’s comfort while they sleep.
Properly adding padding and filling to your pet bed will transform it into a cozy oasis for your furry friend. Experiment with different materials and techniques to create the ultimate sleeping experience tailored to your pet’s needs. Creating personalized pet beds
Personalizing Your Pet Bed with Embellishments
When it comes to creating a pet bed that truly reflects your furry friend’s personality, the key lies in adding personalized embellishments. From decorative trims to custom embroidery, there are endless possibilities to make your pet bed stand out. Let your imagination soar as you embark on this creative journey!
One popular way to personalize a pet bed is by adding decorative trims. These can include ribbons, pom-poms, or even lace. By selecting trims that complement your pet’s unique style, you can instantly transform a plain pet bed into a stylish and eye-catching piece. Creating personalized pet beds
If you’re looking for a more sophisticated touch, consider custom embroidery. You can embroider your pet’s name or a meaningful phrase onto the fabric of the bed. This adds a personal and sentimental element, making the bed truly one-of-a-kind. Creating personalized pet beds
To help you visualize the endless possibilities, here’s a table showcasing some creative embellishment ideas for personalizing your pet bed:
| Embellishment Idea | Description |
|---|---|
| Ribbon Bows | Add colorful ribbon bows to the corners of the pet bed for a playful touch. |
| Embroidered Paw Prints | Create a pattern of embroidered paw prints across the fabric for a whimsical look. |
| Faux Fur Edging | Sew faux fur trim around the edges of the bed to provide extra coziness and elegance. |
| Custom Appliques | Attach custom appliques such as bones, hearts, or your pet’s favorite toy to personalize the bed further. |
Remember, the sky’s the limit when it comes to personalizing your pet bed. Get creative and experiment with different embellishments to create a sleeping space that perfectly suits your furry friend’s individuality.
Cleaning and Maintenance Tips for Your Pet Bed
Proper cleaning and maintenance are crucial for keeping your personalized pet bed fresh, hygienic, and comfortable for your furry friend. Here are some essential tips to help you clean and maintain your pet’s bed:
Tips for Cleaning:
- Start by removing any loose fur or debris from the bed’s surface. Use a lint roller or vacuum cleaner to thoroughly clean the bed.
- Check the care instructions provided with the fabric and follow them accordingly. Some pet beds are machine washable, while others may require handwashing.
- If the bed is machine washable, wash it using a mild laundry detergent on a gentle cycle. Avoid using harsh detergents or bleach, as they can damage the fabric and irritate your pet’s skin.
- For spot cleaning, use a pet-friendly stain remover or a mixture of mild detergent and warm water. Gently scrub the stained area with a soft brush or sponge.
- Rinse the bed thoroughly to remove any soap residue. Proper rinsing is essential to prevent skin irritation or allergies in your pet.
- Once cleaned, allow the bed to air dry completely. Avoid using a dryer, as high heat can shrink or damage the fabric.
Tips for Maintenance:
- Regularly check for any signs of wear and tear, such as loose stitches or weak seams. Repair or replace damaged parts promptly to ensure your pet’s safety and comfort.
- Rotate and flip the bed periodically to distribute wear evenly. This helps maintain the bed’s shape and extends its lifespan.
- Invest in a removable, machine-washable cover for your pet bed. This makes cleaning more convenient and ensures that your pet always has a clean and fresh sleeping surface.
- Consider using a pet-friendly stain and odor-repellent spray to protect the bed from accidents and spills. Always choose products that are safe for pets and follow the instructions carefully.
- Keep the bed in a clean and dry area, away from direct sunlight and humidity. This helps prevent mold, mildew, and unpleasant odors from developing. Creating personalized pet beds
By following these cleaning and maintenance tips, you can ensure that your personalized pet bed remains clean, comfortable, and inviting for your furry companion. Creating personalized pet beds
| Step | Cleaning and Maintenance Tips for Your Pet Bed |
|---|---|
| 1 | Remove loose fur or debris from the bed’s surface using a lint roller or vacuum cleaner. |
| 2 | Check the care instructions and wash the bed according to the fabric’s recommended guidelines. |
| 3 | Spot clean any stains using a pet-friendly stain remover or a mixture of mild detergent and warm water. |
| 4 | Rinse the bed thoroughly to remove any soap residue, ensuring your pet’s skin won’t be irritated. |
| 5 | Air dry the bed completely, avoiding high heat from a dryer that may damage the fabric. |
| 6 | Regularly inspect the bed for wear and tear, repairing or replacing damaged parts as needed. |
| 7 | Rotate and flip the bed periodically to distribute wear evenly and maintain its shape. |
| 8 | Consider using a removable, machine-washable cover for added convenience and cleanliness. |
| 9 | Protect the bed from accidents and spills by using pet-friendly stain and odor-repellent sprays. |
| 10 | Keep the bed in a clean and dry area, away from direct sunlight and humidity, to prevent mold and odors. |
Safety Considerations for DIY Pet Beds
When creating a personalized pet bed for your furry friend, their safety should be your top priority. By following key safety considerations, you can ensure a secure and hazard-free sleeping environment.
1. Choose pet-friendly materials:
Opt for fabrics and materials that are safe and non-toxic for pets. Avoid using materials with small parts, loose strings, or potential choking hazards that can harm your pet. Creating personalized pet beds
2. Select hypoallergenic options:
If your pet has allergies, choose hypoallergenic fabrics and fillings to minimize the risk of allergic reactions and discomfort. Creating personalized pet beds
3. Check for durability:
Ensure the materials you use are durable enough to withstand your pet’s activities. Reinforce vulnerable areas with extra stitching or additional layers of fabric to prevent tearing or unraveling. Creating personalized pet beds
4. Secure all embellishments:
If you choose to personalize the pet bed with embellishments such as decorative trims or custom embroidery, make sure they are securely attached. Loose embellishments can pose a choking hazard or entanglement risk. Creating personalized pet beds
5. Avoid toxic substances:
Avoid using any toxic substances, such as glues, paints, or dyes, that may be harmful if ingested by your pet. Stick to pet-safe alternatives and follow the manufacturer’s instructions carefully. Creating personalized pet beds
6. Provide proper ventilation:
Ensure the pet bed has proper ventilation to prevent overheating. Avoid using thick, heavy fabrics that can trap heat and make your pet uncomfortable.
7. Regularly inspect and clean:
Regularly inspect the pet bed for any signs of wear or damage. Replace or repair any worn-out parts to maintain a safe sleeping environment. Additionally, clean the pet bed regularly to prevent the buildup of dirt, allergens, and pests.
Remember, your pet’s safety and well-being should always come first. By considering these safety tips when creating a DIY pet bed, you can provide a secure and comfortable resting space for your beloved companion.
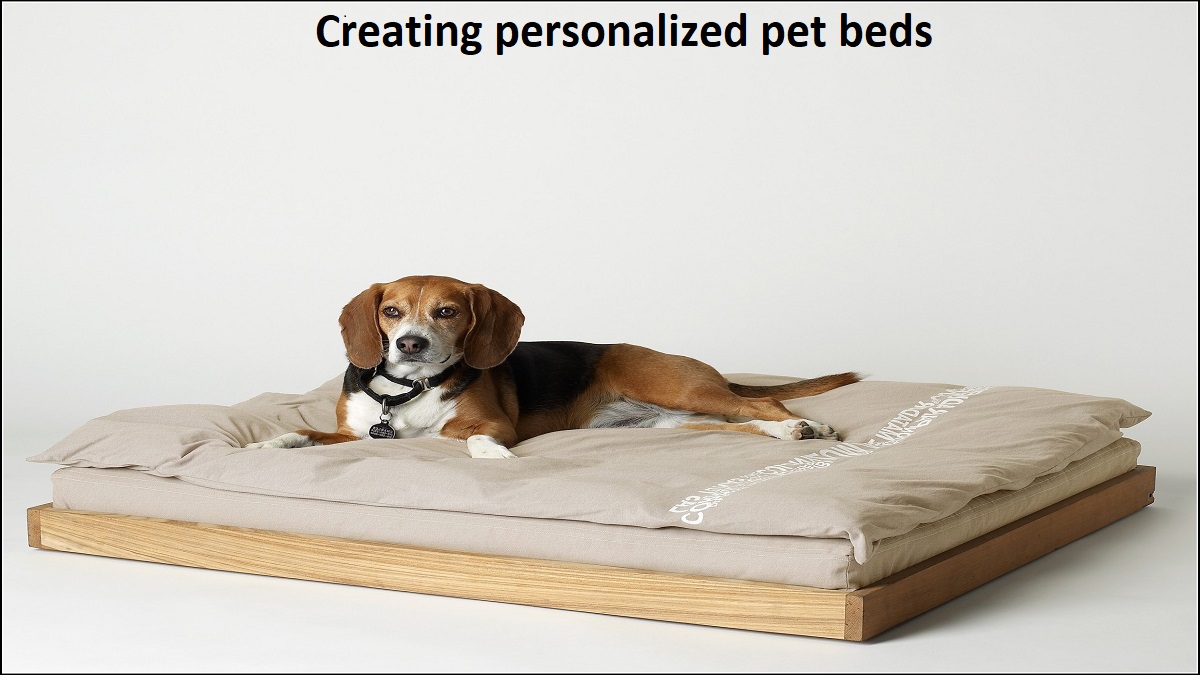
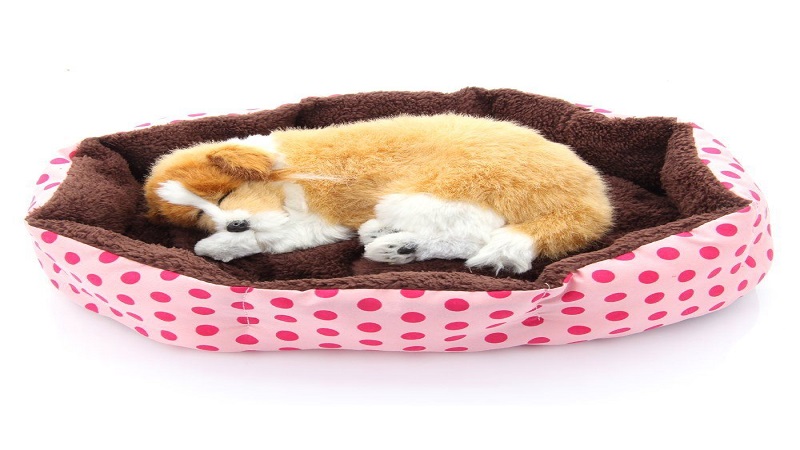
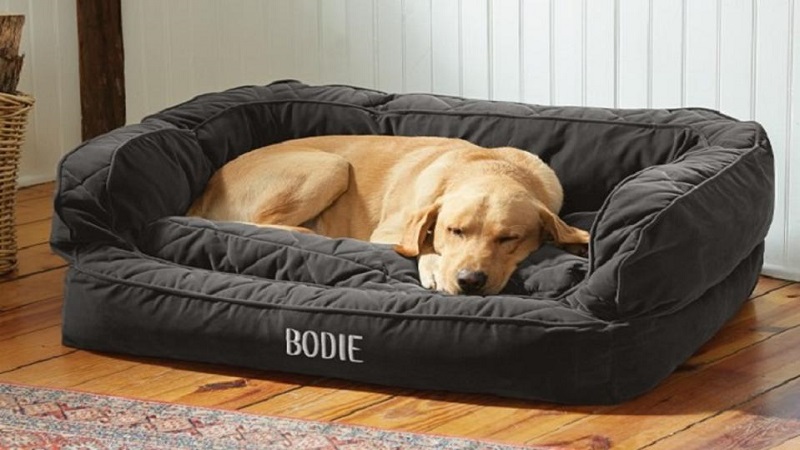
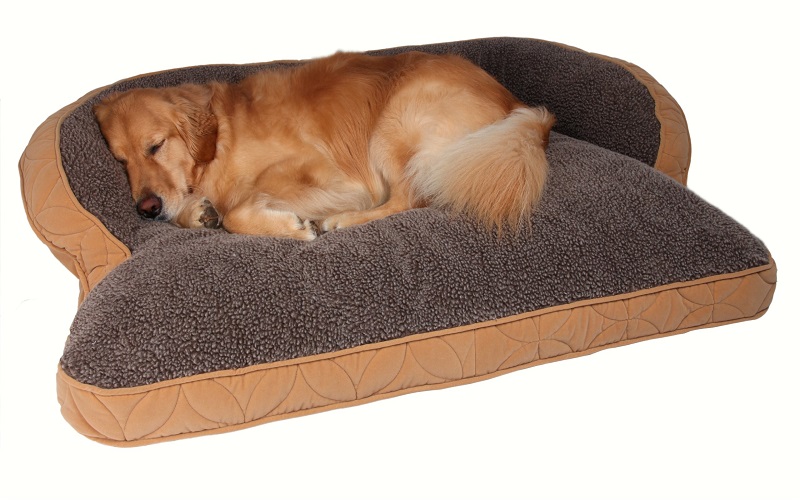
Showcasing Your DIY Pet Bed: Photo Inspiration
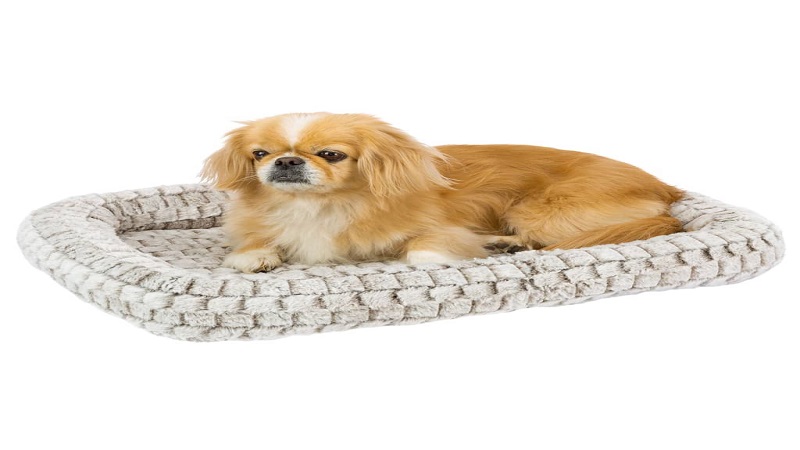
Get ready to be inspired by a collection of stunning photos showcasing various designs of DIY personalized pet beds. These photos provide the perfect opportunity to gather ideas, explore different design possibilities, and ignite your creativity. Whether you prefer a rustic, modern, or whimsical style, you’ll find a wealth of photo inspiration to suit your taste.
Are you looking to create a cozy and inviting pet bed for your furry friend? Feast your eyes on beautifully arranged photos that highlight the comfort and warmth your DIY pet bed can offer. From plush cushions to fluffy blankets, these photos showcase the soft materials and carefully chosen fabrics that will make your pet’s sleeping space a haven of relaxation.
If you’re eager to incorporate unique or unconventional elements into your pet bed design, browse through these photos to discover inventive ideas that go beyond the traditional. The use of vibrant colors, interesting patterns, and playful shapes will capture your attention and encourage you to think outside the box when creating your personalized pet bed. Creating personalized pet beds
Let these photos spark your imagination as you embark on your DIY pet bed journey. Use them as a guide to visualize how different fabrics, colors, and embellishments can transform a simple bed into a statement piece that reflects your pet’s personality. Creating personalized pet beds
Don’t forget to pay attention to the details! The photos featured here highlight the careful craftsmanship that goes into creating a high-quality pet bed. From precise stitching to flawlessly executed embroidery, these close-up shots will inspire you to take your DIY skills to the next level and showcase your attention to detail. Creating personalized pet beds
Ultimately, the purpose of these photos is to inspire you to create a pet bed that is not only functional but also visually captivating. Whether you’re designing a bed for a small dog, a cat, or a larger breed, you’ll find plenty of ideas within this photo collection to suit your pet’s size and personality. Creating personalized pet beds
Get ready to take your pet bed DIY project to the next level with the help of these visually stunning photos. Use them as a starting point to harness your creative energy and design a personalized pet bed that will be the envy of every pet owner. Creating personalized pet beds
Conclusion
In conclusion, creating personalized pet beds can bring immense joy and satisfaction while providing your furry friend with a comfortable and stylish sleeping space. By following the step-by-step DIY guide outlined in this article, you can embark on a fun crafting adventure that allows you to showcase your creativity.
The guidance provided in this article ensures that you select the right fabrics, accurately measure and cut the materials, and master essential sewing techniques to assemble a durable pet bed. Adding extra comfort with padding and filling, as well as personalizing the bed with unique embellishments, further enhances the experience for your pet. Creating personalized pet beds
Remember to prioritize safety when creating your pet bed and follow the recommended cleaning and maintenance tips to keep it fresh and hygienic. Showcasing your DIY pet bed through captivating photos will inspire others and highlight the love and care you’ve put into this project. Creating personalized pet beds
FAQ
What will I learn from this article?
In this article, you will learn how to create personalized pet beds for your furry friends by following an easy-to-follow DIY guide.
What materials do I need to create a personalized pet bed?
Before you get started, gather the necessary materials such as fabric, batting, scissors, sewing machine, and thread.
How do I choose the right fabrics for my pet bed?
You can choose fabrics based on comfort, durability, and aesthetics. Consider factors like washability and pet preferences when selecting the fabric.
How can I measure and cut the fabrics accurately?
Follow the step-by-step process outlined in the article to ensure accurate measurements and precise cutting for a well-fitting pet bed.
What sewing techniques should I use to assemble the pet bed?
Learn various sewing techniques such as straight stitching and hemming to securely assemble the different fabric pieces of your personalized pet bed.
How can I add extra comfort to my pet bed?
Enhance the comfort level of your pet bed by adding padding and filling. The article guides stuffing and securing the filling for optimal comfort.
Can I personalize my pet bed with embellishments?
Absolutely! Get creative and personalize your pet bed with decorative trims, custom embroidery, or any other embellishments that suit your pet’s personality.
How do I clean and maintain my pet bed?
Proper cleaning and maintenance are essential. You will find helpful tips in the article to keep your personalized pet bed fresh and hygienic.
Are there any safety considerations when making DIY pet beds?
Yes, it’s important to prioritize your pet’s safety. The article covers key safety considerations to ensure a secure and hazard-free sleeping environment. Creating personalized pet beds
Can I get photo inspiration to showcase my DIY pet bed?
Yes! The article includes stunning photos of DIY personalized pet beds, providing you with design ideas and creative arrangements to showcase your project. Creating personalized pet beds
